
Scratching Myself To Distraction
One thing I like very much about my mostly hand tool approach to woodworking is how it is mostly jig free. I have a dislike for gadgets and I would rather spend my time making progress on the piece than making a tool or a holder for a tool. That aversion had lead me to put building several things I would probably like very much to have. A good bow saw for one, a scratch stock for another. To make the progress I wanted on this build I had to upgrade something.
I'm working my way through a build of the School Box from the book "The Joiner and Cabinet Maker" If you want to catch up on what I've done so far you can see all the post collected together HERE. (Fair warning they're in reverse chronological order with the newest at the top so keep scrolling down and see the build work it's way backwards to rough stock.)
I needed a couple of scratch stocks. I wanted to make a little bead detail on the mouldings to wrap around the base and lid of the box. They are simple little tools to make and I've had them on my "Gosh I should make one or two of those" list for a while. Apparently the time had come.

I'd picked up a saw at the home center on clearance for a dollar a while ago. I never intended to actually saw with it, the intention was to use the blade steel for something like this. I also had a section of hickory in the off cut pile.

The hickory had a nice knot in the middle of it so what I thought might be three of a kind turned into a pair. I've never been good at poker anyway.

I got them sawed down to size and took them over to the band saw to get them roughed into their "L" shapes.

Then I spent a few minutes with the rasp to smooth out the saw marks from the band saw and to give a little ease to all the edges.

I marked up the saw blade with a square and a sharpie. I chose to make strips the same width as the blade of the tri-square. I used a cutting blade on my angle grinder to cut them up. Sorry no pics of the sparks flying.

I don't have a great picture of it but the steel blade fits in a thin saw kerf that runs up the thin area. You place a screw at the most distal end of the arm to pinch the kerf together and hold the blade in place.

But I wasn't getting off the jig and appliance train just yet. Papa needed just one more fix. The mouldings I was working with were narrow, about 1 3/8ths inch wide and that makes work holding more difficult. So I decided to make a moulding shooting board like the one I saw used in Mathew Bickford's book "Mouldings in Practice"

It's a simple thing. I decided to make mine two sided out of a section of pine 1x6 I had sitting around. I cut the board to four foot, I kept half for the bed and ripped a strip off the other section to attach to the top. It's not as fussy to make as an end grain shooting board where you really want to make the fence square. In a moment of decision I decided to make this one two sided, one side narrow and one wider to support different kinds of stock.

A little glue and a couple screws set the fence in place. Then you countersink a couple screws in the ends of the bed that you can raise and lower to act as a stop for the stock you're planing. In use I butted the jig up against a bench dog and held it down with a hold fast.

After using it for a bit I decided to add screw stops to both sides. It makes it easier to work on both sides of the moulding and work with the grain.
.JPG)
For the bottom moulding's I chamfered the top and ran a bead around the bottom edge. The scratch stock worked pretty well for the first time out of the gate.

I dovetailed and wrapped the mouldings around the box. A little hide glue and a couple nails and they were attached.

And I have to say I really liked the way they turned out. The bead and the chamfer are subtle. The single dovetail is strong, and not out of place and the black walnut I made the mouldings from is a nice, framing contrast to the wild grain of the curly red oak.
Ratione et Passionis
Oldwolf
I'm working my way through a build of the School Box from the book "The Joiner and Cabinet Maker" If you want to catch up on what I've done so far you can see all the post collected together HERE. (Fair warning they're in reverse chronological order with the newest at the top so keep scrolling down and see the build work it's way backwards to rough stock.)
I needed a couple of scratch stocks. I wanted to make a little bead detail on the mouldings to wrap around the base and lid of the box. They are simple little tools to make and I've had them on my "Gosh I should make one or two of those" list for a while. Apparently the time had come.

I'd picked up a saw at the home center on clearance for a dollar a while ago. I never intended to actually saw with it, the intention was to use the blade steel for something like this. I also had a section of hickory in the off cut pile.

The hickory had a nice knot in the middle of it so what I thought might be three of a kind turned into a pair. I've never been good at poker anyway.

I got them sawed down to size and took them over to the band saw to get them roughed into their "L" shapes.

Then I spent a few minutes with the rasp to smooth out the saw marks from the band saw and to give a little ease to all the edges.

I marked up the saw blade with a square and a sharpie. I chose to make strips the same width as the blade of the tri-square. I used a cutting blade on my angle grinder to cut them up. Sorry no pics of the sparks flying.
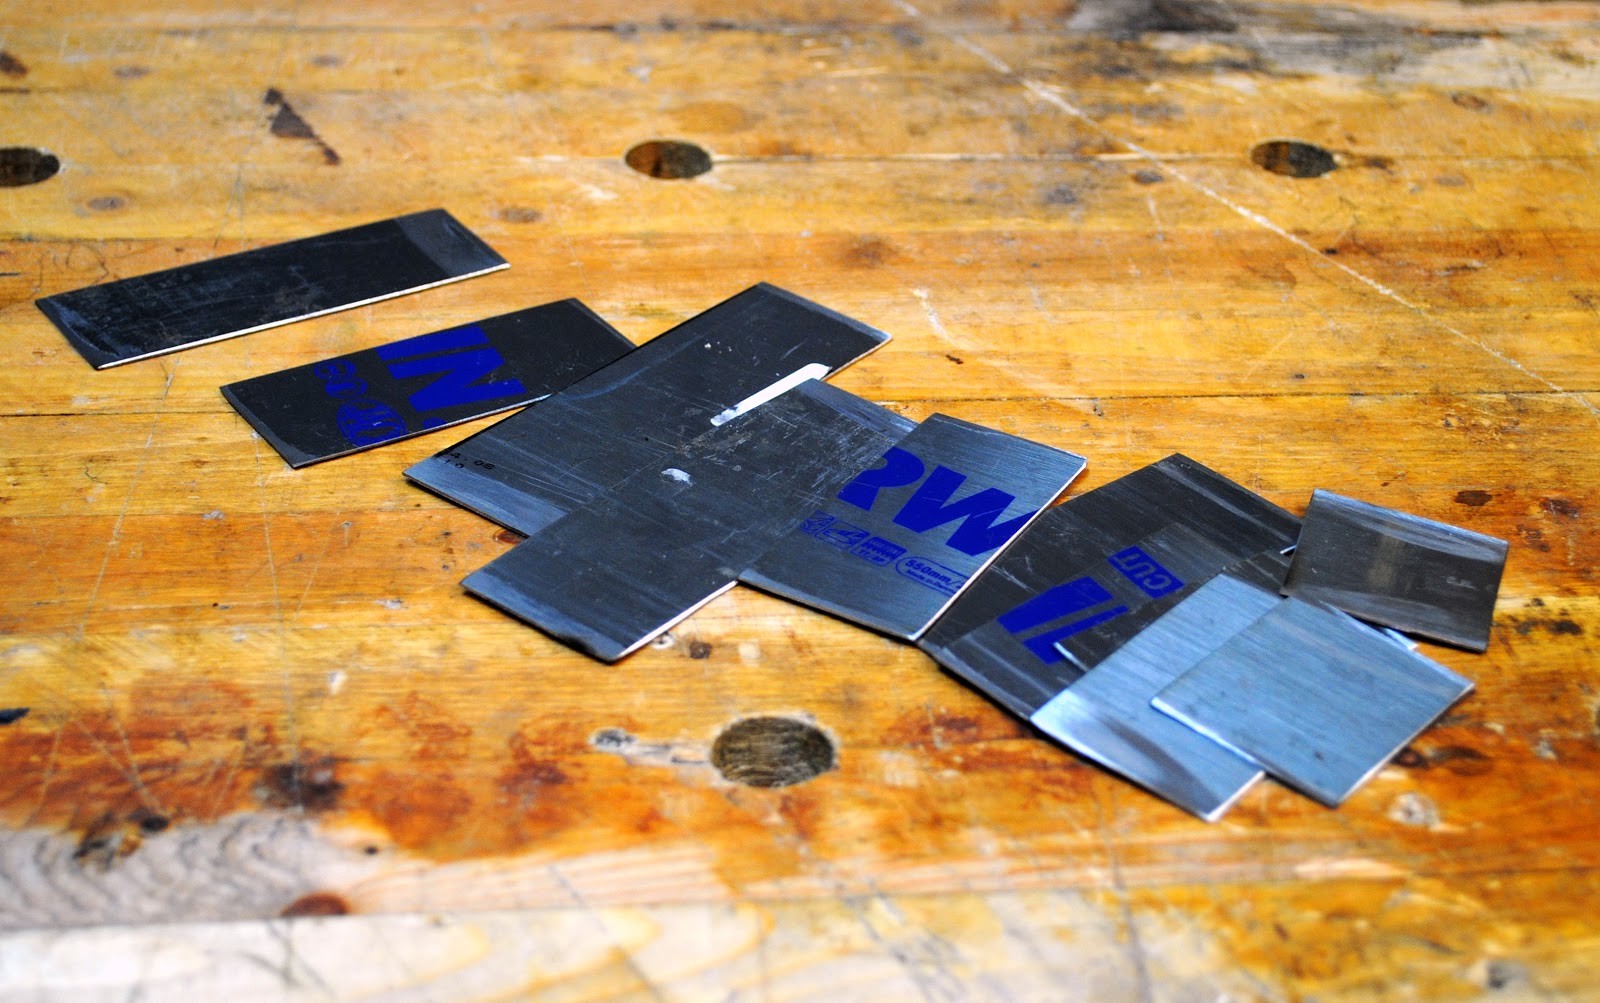
I don't have a great picture of it but the steel blade fits in a thin saw kerf that runs up the thin area. You place a screw at the most distal end of the arm to pinch the kerf together and hold the blade in place.

But I wasn't getting off the jig and appliance train just yet. Papa needed just one more fix. The mouldings I was working with were narrow, about 1 3/8ths inch wide and that makes work holding more difficult. So I decided to make a moulding shooting board like the one I saw used in Mathew Bickford's book "Mouldings in Practice"

It's a simple thing. I decided to make mine two sided out of a section of pine 1x6 I had sitting around. I cut the board to four foot, I kept half for the bed and ripped a strip off the other section to attach to the top. It's not as fussy to make as an end grain shooting board where you really want to make the fence square. In a moment of decision I decided to make this one two sided, one side narrow and one wider to support different kinds of stock.

A little glue and a couple screws set the fence in place. Then you countersink a couple screws in the ends of the bed that you can raise and lower to act as a stop for the stock you're planing. In use I butted the jig up against a bench dog and held it down with a hold fast.

After using it for a bit I decided to add screw stops to both sides. It makes it easier to work on both sides of the moulding and work with the grain.
.JPG)
For the bottom moulding's I chamfered the top and ran a bead around the bottom edge. The scratch stock worked pretty well for the first time out of the gate.

I dovetailed and wrapped the mouldings around the box. A little hide glue and a couple nails and they were attached.

And I have to say I really liked the way they turned out. The bead and the chamfer are subtle. The single dovetail is strong, and not out of place and the black walnut I made the mouldings from is a nice, framing contrast to the wild grain of the curly red oak.
Ratione et Passionis
Oldwolf


Thanks for the sharing your school box build. It's on my (long) list of stuff to build when I get the time. Watching you work through it makes me feel like I'm at least making some progress :-).
ReplyDeleteAlso, I really enjoy your blog. Thanks again for sharing. It's appreciated.