
Saw Bed Down
Continuing down the path of the rehabing a Stanley Miter Saw, I had the saw clean and rehandled, I had the miter box itself cleaned, oiled, and repainted. It was time to put down a replacement wooden bed for the stock to ride on.

I had a piece of 1/2" thick red oak rolling around the shop and that seemed like it would do the job nicely. I took the old saw bed and used it to get the proper width.

A few seconds with a rip handsaw and a little plane to the edge and I was down. I then laid out the bed on the miter box to get the correct length and cut that with a carcass saw and a bench hook.

I don't think the originals had dressed up corners, but one of the other restorations I saw out there had them and I liked them, so why not?

I sawed out the space and hit the edges with a rasp until I had refined the shape I was looking for.

I guess you couldn't tell I've recently finished reading "Greene & Greene Furniture: Poems of Wood and Light" by David Mathias. The corners look a little cloud liftish to me. I kind of like them.


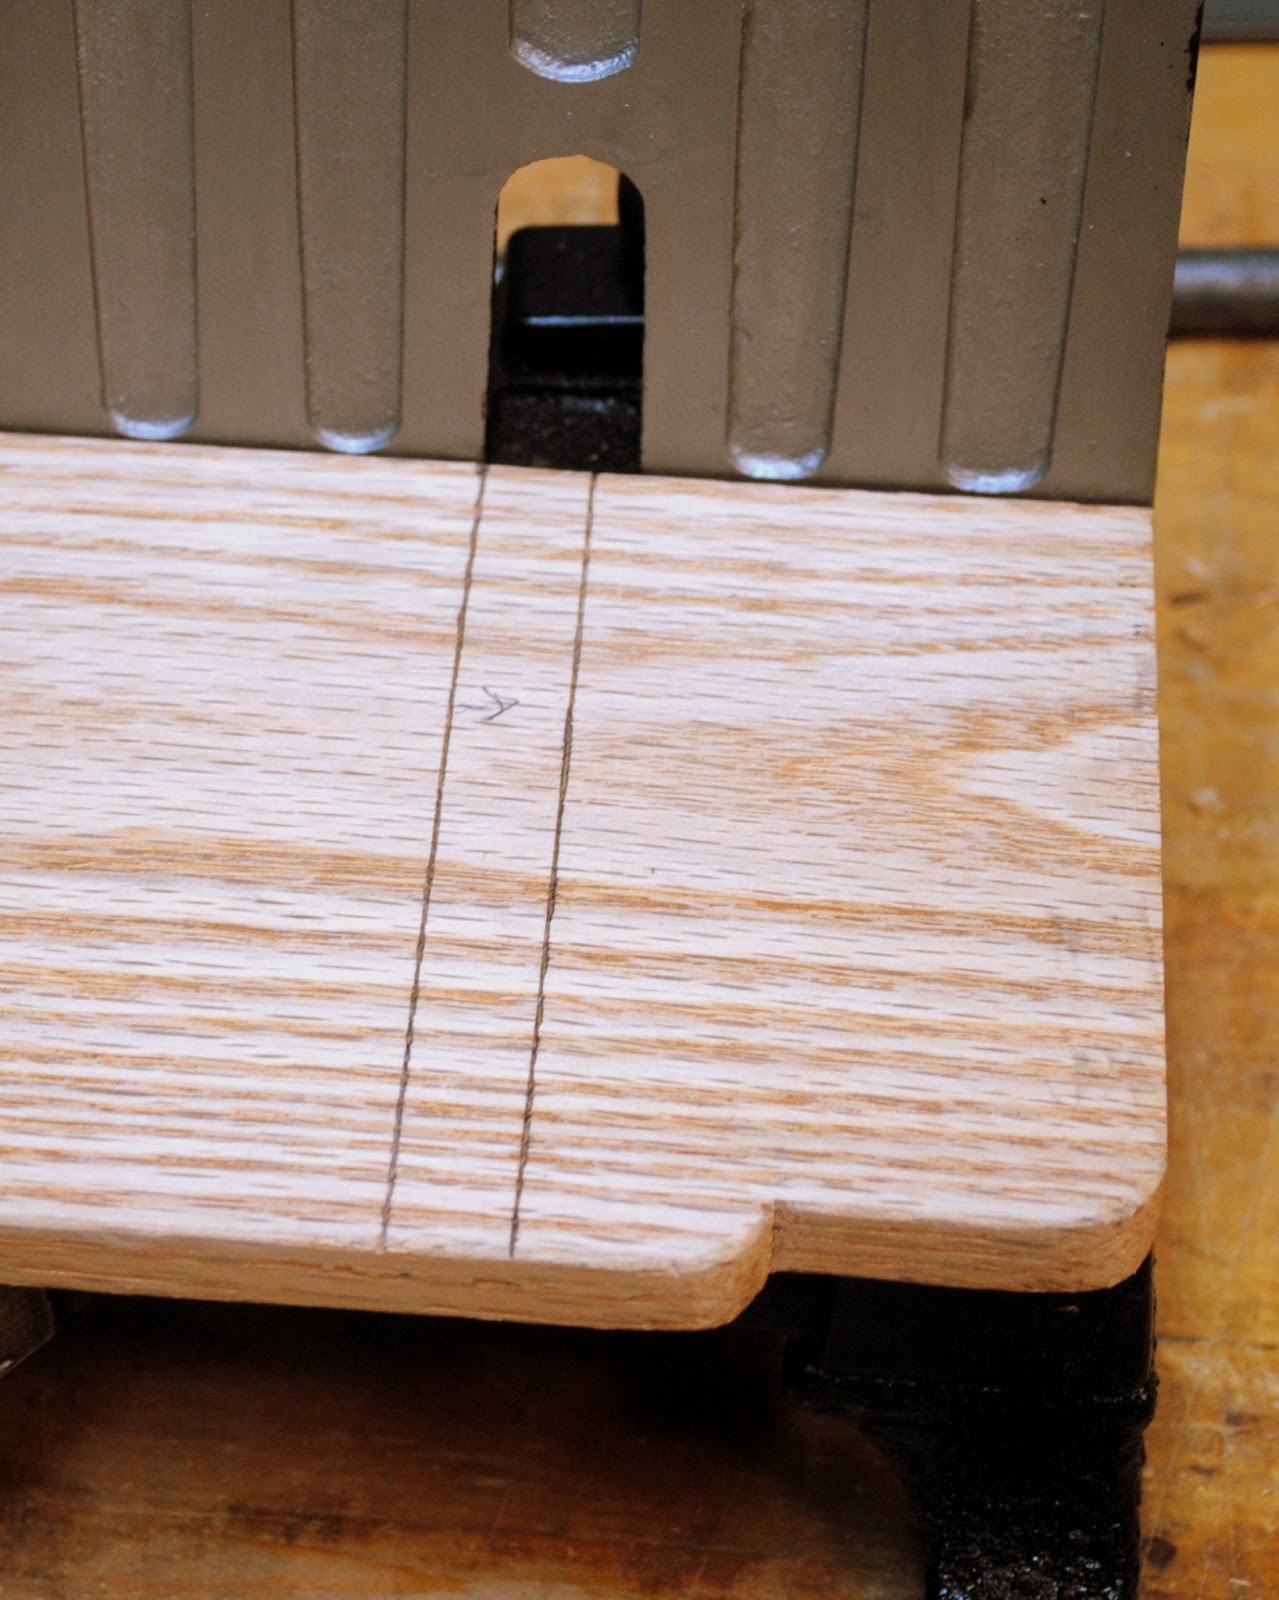
One of the missing parts I have to fabricate is a pair of "L" brackets that ride in a couple grooves in the saw bed. They help hold the stock you're sawing in place against the back and forth of the saw's motion. I hadn't made the pieces yet but I knew they would be 1/2" wide and the bed section would be 1/8" thick. I marked their placement out and cut down the sidewalls with my carcass saw.

Then I cleaned up the groove with a chisel and a router plane.

All that was left was to place a little finish on the board and screw it back into place
.JPG)
I'm pretty happy with the end result. Soon I'll have the other parts finished and the miter saw will be good as new and pulling it's weight in my shop.
Ratione et Passionis
Oldwolf

I had a piece of 1/2" thick red oak rolling around the shop and that seemed like it would do the job nicely. I took the old saw bed and used it to get the proper width.

A few seconds with a rip handsaw and a little plane to the edge and I was down. I then laid out the bed on the miter box to get the correct length and cut that with a carcass saw and a bench hook.

I don't think the originals had dressed up corners, but one of the other restorations I saw out there had them and I liked them, so why not?

I sawed out the space and hit the edges with a rasp until I had refined the shape I was looking for.

I guess you couldn't tell I've recently finished reading "Greene & Greene Furniture: Poems of Wood and Light" by David Mathias. The corners look a little cloud liftish to me. I kind of like them.

One of the missing parts I have to fabricate is a pair of "L" brackets that ride in a couple grooves in the saw bed. They help hold the stock you're sawing in place against the back and forth of the saw's motion. I hadn't made the pieces yet but I knew they would be 1/2" wide and the bed section would be 1/8" thick. I marked their placement out and cut down the sidewalls with my carcass saw.

Then I cleaned up the groove with a chisel and a router plane.

All that was left was to place a little finish on the board and screw it back into place
.JPG)
I'm pretty happy with the end result. Soon I'll have the other parts finished and the miter saw will be good as new and pulling it's weight in my shop.
Ratione et Passionis
Oldwolf


Nice work. :) I've read the book you mention, and had the opportunity to visit the Gamble house on a tour with a woodworker as a tour guide.. very inspiring stuff, and a bit overwhelming too.
ReplyDeleteNever us oil for tapping or any other metal cutting. Oil is a lubricant. You need to buy a small can of "cutting fluid", the kind that plumbers use to thread pipe. Also, drill the tap hole two sizes bigger than what is recommend. You do not need a full depth for the thread to be deep enough. Always use a starting tap first, if it's a bottom hole, then finish with a bottoming tap, one that isn't tapered. If it's a through hole, the starting tap that is tapered will do the job.
ReplyDeleteBetter luck next time with your threading of holes.
MarvW