
Look At Them Funny Shaped Dados!?!
I haven't written a "How I Do It" here in a while. Let me dig out my soap box, I think it's over here somewhere . . .
Sliding dovetail joints.


Not a great shot, but the next step is to grab your saw and start to sever fibers. Like paring, sawing is a gateway skill you should master over time. See the line and cut the line no matter what angle.

Like cutting half blind dovetails I will extend my line past the stopping point and remove as much as possible with short strokes of the saw and pushing the toe into the cut. Obviously this is an easier thing to accomplish if your sliding dovetail traverses the full width of your stock and you don't have to worry about a terminal end for the joint

Then it's more chisel work. Take care with this step so you don't blow out the corners. In stock like this pine I don't mind making choping cuts with the grain. With easy splitting woods like oak or walnut I will take more care and lightly score the waste with the grain then make deeper downward chops perpendicular to the grain. This lessens my chance of crying over blow outs, or worse, splitting the board itself.

I use a narrowed 1/4" chisel to pare out the chips. Take care and sweep them towards the mouth of the joint instead of trying to pry them upwards. You can't pull a wedge out from the narrow end. This part takes time. Once you remove most of the waste, pare out the sides and make sure the corners are clean.

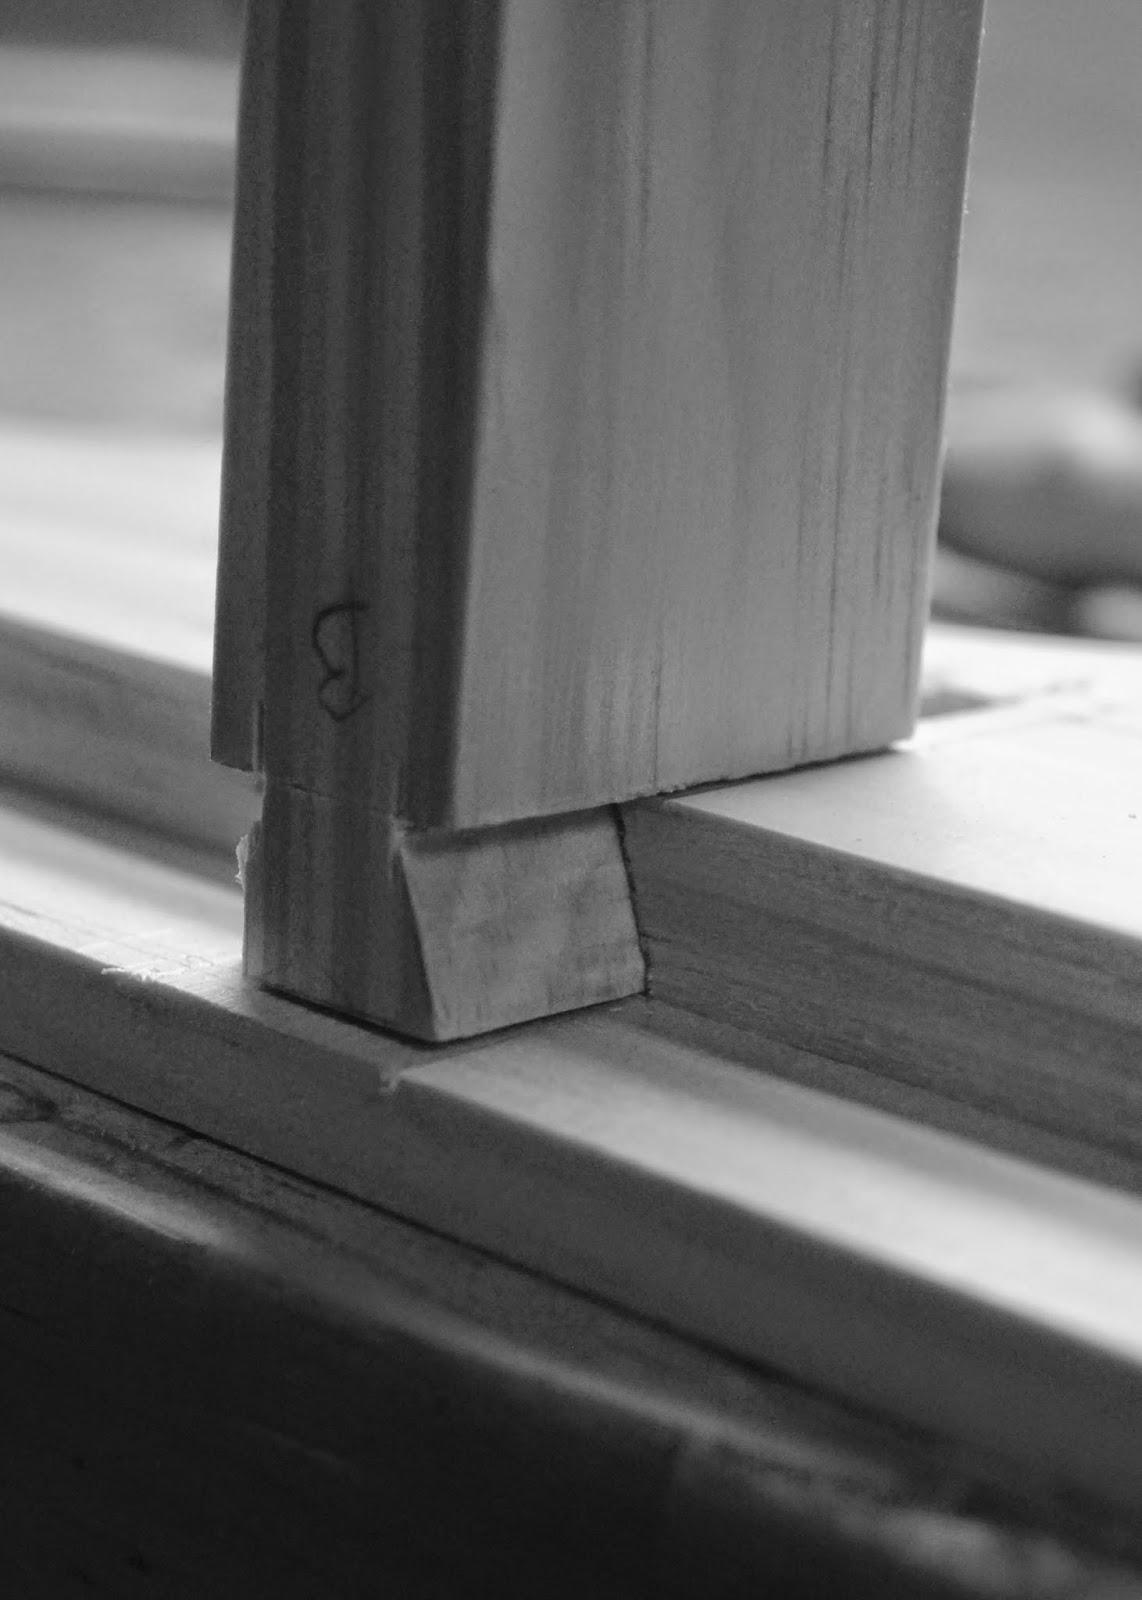
Give it a test fit. If you're hanging up somewhere, gently knock the pieces apart, diagnose the issue, and fix it with a sharp chisel.

Modern annexed territory of my noisy nemesis The Router. Gather with me brothers and sisters I say it's time for a revolution. It is time we reclaimed this land as ours. Not with gimmickry or gadgetry, no specialty planes or tricks. A couple chisels, a carcass saw, and our own hands and eyes are all we need to accomplish our goals. Viva La Anarchy!!!
All right, maybe I get a little carried away sometimes, but this is a useful joint that is easy to over think. I haven't cut one in a long time but it's just what the doctor ordered for adding strength and rigidity to the project I'm building right now. While I was working I thought about how many hand cut through dovetail joint videos and tutorials are out there and, while there are some, how this joint just doesn't get the same recognition.
I start with the tail board, marking my depth with a marking gauge (this time it's 3/8") and the width of the narrow part of my tail. Typically I will make the narrow of the tail half the thickness of the stock. 3/4" stock means the tail is 3/8" thick this time.
I don't kill myself with this measurement. I use a 3/8" chisel, center it by feel and by eye and mark on either side. If it looks right it is right, no micrometer necessary.
Then I take my small 6" ruler and connect the corners to my marks with a fine pencil line. I only do this marking on one side of the board because accurately repeating it on both sides seems wasteful of my time and effort. The lines are just general guides after all.
I prep the shoulders of the joint for a First Class Saw Cut using a wide chisel to make a V shaped trough to guide the carcass saw more accurately.
I saw down gently with my carcass saw concentrating on making a flat, even cut. Oops, looks like I passed the line a little. Shame on me.
I use my bench hook as a backer and start paring to the shape I want.
This is "select pine" from the home center but I've done the same operation with hardwoods like walnut and oak to the same effect. According to the sticker this stuff is a product of New Zealand! How's that for adding some exotic woods to my repertoire. I do seriously love the multi-colored end grain. It's almost hypnotic.
Keep working until you've defined the shape
Flip and repeat. I inspect my cuts in raking light and at a few angles for quality. I've learned to visualize flat and square pretty close by eye and I know if I miss something and it shows up as an issue in the dry fit I can pare a little more then. Better is the enemy of good.
I use a square to register the tail board to what will be the pin board. The rabbets on this piece help with registering depth but when I don't have them I just sight it in like I do when making regular dovetails and line up the shoulders with the inside edge of the pin board.
Hold the board down tight so it doesn't move while you mark the layout. You'll notice I have mastered my the patented One Finger Death Grip. This is only cleared for Level 6 and above personnel.
Not a great shot, but the next step is to grab your saw and start to sever fibers. Like paring, sawing is a gateway skill you should master over time. See the line and cut the line no matter what angle.
Like cutting half blind dovetails I will extend my line past the stopping point and remove as much as possible with short strokes of the saw and pushing the toe into the cut. Obviously this is an easier thing to accomplish if your sliding dovetail traverses the full width of your stock and you don't have to worry about a terminal end for the joint
Then it's more chisel work. Take care with this step so you don't blow out the corners. In stock like this pine I don't mind making choping cuts with the grain. With easy splitting woods like oak or walnut I will take more care and lightly score the waste with the grain then make deeper downward chops perpendicular to the grain. This lessens my chance of crying over blow outs, or worse, splitting the board itself.
I use a narrowed 1/4" chisel to pare out the chips. Take care and sweep them towards the mouth of the joint instead of trying to pry them upwards. You can't pull a wedge out from the narrow end. This part takes time. Once you remove most of the waste, pare out the sides and make sure the corners are clean.
Give it a test fit. If you're hanging up somewhere, gently knock the pieces apart, diagnose the issue, and fix it with a sharp chisel.
In the end you win because I end up with a good joint cut with a minimum of tools and fuss. There were no jigs or test cuts to be made, and most importantly to me. I was able to listen to the Black Keys channel on Pandora Radio the whole time.
Ratione et Passionis
Oldwolf
P.S. Before I go I should preemptively say to router lovers, please put down your spears and arrows. If you want to cut these joints with a router, then why would my opinion stop you. I do actually own two routers and a router table myself and sometimes they are the perfect solution to a furniture building problem. It's just that for me, that "sometimes" is not very often at all.
I don't think I've used my router table in . . . well has it been more than two years already? Maybe more than three. Wow.
D


Great post! Thank you very much for tips!
ReplyDelete