
The Drawbore Oddessy
I almost began to think that a simple economics would price me out of being able to try an operation like drawboring mortise and tenon joints. I am so glad I was wrong.
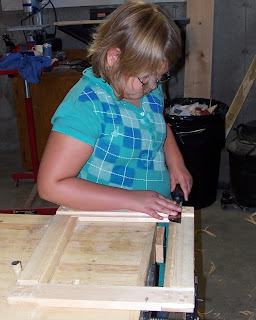 First, just to be sure we are all together, I'm going to explain, a common practice to better secure mortise and tenon joints is to drill holes through the assembled and finished joint and "pin" it with dowels sized to the holes. cut the dowels off flush and you have a joint that will be mechanically stronger than the glue itself. The picture shows my daughter Fayth cutting dowel pins flush after using them to better secure her half lap joints on a frame, same idea. drawbore pins take the process to the next level. you fit a basic M&T joint but you only drill your initial holes through the mortise board. You then drill holes into the tenon that are off-set just slightly, so when you drive the pins in, the offset holes actually draw the two boards together. forming an even stronger joint that can be done without the want for clamps, and possibly without the requirement of adhesive.
There is a requirement though, to make the joint work you need a set of specialized tools called "drawbore pins" basically they are tapered metal shafts that will do the initial work of pulling the joint together, and will help shape the way for the incoming dowels. The biggest problem with them, They are god damn expensive!! Ninety dollars a pair at Lie Nielsen, a Google search on shopping tonight showed an antique pair for $155. That these prices I would have never been able to afford them. So I was only doing drawbores in my dreams.
 Then I stumbled across a good article by my personal hero, Chris Schwarz, and he spoke about making cheaper beginners drawbore tools from an Alignment Tool (you can check out the article called "Drawboring Resurrected" HERE) and I had a slap myself on the forehead moment. I had done some concrete work while in high school, the pig farm I worked on was remodeling some of the old barns and pens with concrete walls and we used these alignment tools to pin forms together. I felt stupid for not thinking of it myself. At first I went looking on sears.com to see if I could order the same set Chris wrote about, no dice, none availible to order. So I took a little trip to Menards and went to the masonry tools, and sure enough a dozen big puppies sitting in a bin. I found the two I considered to be "nicest" bought them and went home. At six bucks a piece I had just managed to get myself into the drawboring game!
 I really wanted to give them a try on the legs I'm building for my version of a Joinery Bench, (to see the rest of the build up to this point click HERE) Basically the legs are a frame of 2x material joined with M&T joints. I really wanted the strength that drawboring talked about. I spent most of Saturday and Sunday cutting out th e joints. I started with the tenons. I like to mark them out with a marking gauge and saw the shoulder down to the right depth with a backsaw. Then I use a broad chisel and chunk out most of the wood down close to the marked line. Then I use a router plane set to the right depth to finish the face. I hold my hand steady on the high face of the board and pivot my way through the material. skimming it down level and even.
 Then I go again with the marking gauge and this time I chose to remove an inch from each end, I mark it, undercut along the shoulder, and then chop the side of the tenon with a chisel in two or three cuts. The first to remove most, the second to pare close to the line and the third to pare onto the line. the first two cuts are with a mallet. The last paring cut is just pushed.
Then I marked out my mortise locations on the upright sections of the leg frame, I picked up the mortise chisel, looked the process of chopping out eight mortises 3/4 inch wide by 3 inches long by 2 1/4 inch deep. My injured shoulder groaned, my tennis elbow whimpered a little bit, and I turned all Nancy girl for a while. I piled everything into the van and drove over to the soon to be new location for the Oldwolf Workshop, where all the stationary power tools are currently stored. I pulled the tarp off the drill press, reset it up, attaching everything that had been removed for the return trip home from Maine, chucked in a forstner bit, and killed electron after electron.
Honestly I don't feel that bad, I could have spent two more days chopping mortises and destroyed my shoulder for a while from all the hammering, or I could get them done in an hour and a half, with time to set up the machine. This Nancy boy chose the electron path this time. A little more work once I got back to the shop to shave and fit everything for the final go and now we're ready to try the new trick.
Now other people out there on the web have taught drawboring technique better than I can, and I figure why try and reinvent a perfectly good wheel. So here's the quick and dirty of how it went. I decided to use a 3/8ths inch dowel. I rived some up using my newer doweling plate the other day and I was ready to go.
I drilled the holes through the mortise section of my leg.
 Then I inserted the tenon and marked the location using a 3/8 forstner bit on a brace, The marks have been darkened with a pencil to help identify them here on the blog.


Then I used the new mark from the scratch awl to center the forstner bit, and I drilled the tenon holes. Then, though some sources say no glue in needed, I still decided to add some glue to the mix. and I reassembled the joint together.
 Now here's where I made the mistake on my first one. the drawbore pins are supposed to be used in pairs, you drive them into all of the holes to help shape the passage before you pound in the pins that have been tapered on one end. In my excitement, I forgot to shape both holes on the first corner. I pounded in the pin and then tried to force the tapered dowel through a hole that had need no drawbore pin yet. The result EPIC FAIL. I blew the hell out of the backside. I'll fix things and glue the blown out pieces back into place tomorrow. The next corner I slowed down and got it right.
 All four corners done and I have to say. a finished frame leg, no clamp time for the glue to dry, no just trusting the glue alone. the joints feel super solid from the second you say go. I think I may have just found a new addiction.

I pushed the leg into the cleat just to see how it fit and get a rough idea how it would look. I have to say I'm very pleased, I'll fix up the other leg tomorrow. Until then.

Cheers
Oldwolf

There is a requirement though, to make the joint work you need a set of specialized tools called "drawbore pins" basically they are tapered metal shafts that will do the initial work of pulling the joint together, and will help shape the way for the incoming dowels. The biggest problem with them, They are god damn expensive!! Ninety dollars a pair at Lie Nielsen, a Google search on shopping tonight showed an antique pair for $155. That these prices I would have never been able to afford them. So I was only doing drawbores in my dreams.


Then I marked out my mortise locations on the upright sections of the leg frame, I picked up the mortise chisel, looked the process of chopping out eight mortises 3/4 inch wide by 3 inches long by 2 1/4 inch deep. My injured shoulder groaned, my tennis elbow whimpered a little bit, and I turned all Nancy girl for a while. I piled everything into the van and drove over to the soon to be new location for the Oldwolf Workshop, where all the stationary power tools are currently stored. I pulled the tarp off the drill press, reset it up, attaching everything that had been removed for the return trip home from Maine, chucked in a forstner bit, and killed electron after electron.
Honestly I don't feel that bad, I could have spent two more days chopping mortises and destroyed my shoulder for a while from all the hammering, or I could get them done in an hour and a half, with time to set up the machine. This Nancy boy chose the electron path this time. A little more work once I got back to the shop to shave and fit everything for the final go and now we're ready to try the new trick.
Now other people out there on the web have taught drawboring technique better than I can, and I figure why try and reinvent a perfectly good wheel. So here's the quick and dirty of how it went. I decided to use a 3/8ths inch dowel. I rived some up using my newer doweling plate the other day and I was ready to go.
I drilled the holes through the mortise section of my leg.


Then I removed the tenon and used a scratch awl to mark a new hole to drill OFFSET TOWARDS THE SHOULDER. I chose an offset almost to the outer line of the original mark. There is no science to this, it is make your best judgment.

Then I used the new mark from the scratch awl to center the forstner bit, and I drilled the tenon holes. Then, though some sources say no glue in needed, I still decided to add some glue to the mix. and I reassembled the joint together.


I pushed the leg into the cleat just to see how it fit and get a rough idea how it would look. I have to say I'm very pleased, I'll fix up the other leg tomorrow. Until then.

Cheers
Oldwolf


Thanks for the idea! Or re-posting the idea for the drawbore pins. I was lamenting the prices on those just recently, and now you've given me hope! I checked Harbor Freight and they have a "12 Piece Jumbo Punch and Chisel Set" that looks like it has 2-3 shaped right for drawbore pins. And it's cheaper than other options.
ReplyDeleteIt will take a little work to get them in good shape but I am going to try chucking the up in the lathe or drill press to see if I polish them up with sandpaper the easy way.
badger
Hey, I never thought of checking Harbor Freight, These are pretty rough and good for big 3/8 pins, but for finer joinery on doors and joined chests, I'd like to find some more delicate ones.
ReplyDeleteI didn't bother to so any shining or finishing on these. You make me wonder now if I should have, or still should, Hmmm. . . . maybe the finer set could really use it and I love the idea of using the lathe to really speed the process and accuracy of what you can do by hand.
Thanks for the ideas and thanks for reading!
Oldwolf
I really enjoyed your post, and the pictures made it much easier, for a beginner such as myself, to grasp. Thanks. You did a nice job of explaining.
ReplyDeleteDraw bore tools ? Chuckle .... o-my I've made all my joints wrong ? All I do is taper the end of the wooden peg and drive them in at the same time . Honestly I saw them doing this years ago my way and never heard of these tools till today . I use " KISS " because I can be stupid at times .You can check out some of my medieval projects on lumberjocks at randomray .
ReplyDeleteRandomray
ReplyDeletelol. I don't believe there is ever a wrong way to do anything, the results are proof in the pudding and if you are getting good results then you're doing it right.
I had pegged my joints before but when I heard of drawboring them together, the method I saw was using the pins or tools. We all learn different ways.
I have gotten the chance to check out your stuff on lumberjocks and you got some nice work. I love to hear of others interested in medieval style projects, there's not a whole lot of us out there, maybe just enough of us.
Just read your blog and it helped me understand the mechanics of draw bore much better. I spent most of my life working with metal and thought id mention using hole alignment pins for the draw bore tools. They come in pretty much any size you could wish for and are fairly inexpensive. Ill post an address where you can get them from below if your interested.
ReplyDeletehttps://www.mcmaster.com/#taper-pins/=fe3ccbfc9a5a4c2a8c56555dcb02b7c4juq1yxmw