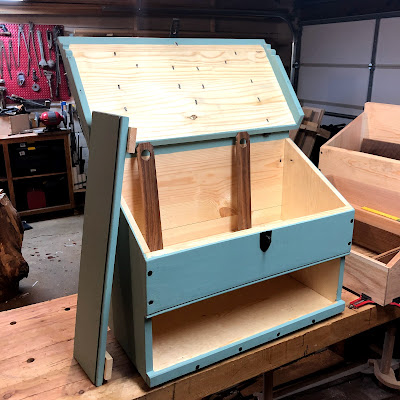
Inside A Dutch Tool Chest: Plane Storage
Continuing this quick series on kitting out the inside of my new Dutch Tool Chest. I understand that everyone tackles the problem differently and everyone's tools and needs are different, but I still felt exploring the intent and thought process behind my decisions might have some worth. All the posts related to this (and anything DTC related) are collected under THIS LINK HERE if you are inclinced to catch up or go back.
-D
There is a Holy Trinity of hand tool woodworking. Saws, Planes and Chisels. Yes you can make arguments for variations on these themes and your precious favorite thing, but everything outside these three broad categories falls into sainthood and other levels of canonization. The Holy trinity are my most important items to locate and secure and everything else can be filled in around them.
With the saws sorted the planes are the next item. They are the heaviest of the three and take up the largest footprint in the chest but there isn't a need for anything fancy to keep them in place, Their weight does the job. All that needs to be done is fence them in from sliding around too much.
The first decision is which planes. I keep a modest collection of Stanleys in my traditional chest (#3 -#7) and I don't understand why anyone would need more than those except for specialised work. This doesn't count for joinery planes, that's a different monster. I'm just trying to account for the basic workhorse planes for preparing and flattening a board.
If I break things down into the simplest, most basic I can solve most of my problems with three planes, a #5 Jack Plane, a #3 Smoothing Plane, (I prefer over the #4) and my #18 block plane.
Again, I wasn't concerning myself with any of the joinery planes. The idea was a general set that would accomplish most basic coverage for classes (both teaching and taking) and demonstration work. If I'm planning something that has need of a longer truing plane or some of my joinery planes I will pack them carefully in the bottom or use a seperate tool bag.
Even though this chest is intended to move around, carried up and down staircases on a dolly and riding in the back of a car, the only thing needed to keep the planes behaving is a few 1/4" x 1/4" strips of spacer. The weight of the plane does most of the rest. I set the plane where I want it to live. trace the area with a pencil, then place the spacers leaving a touch of room, I don't want a socket tight fit or I'll have trouble later, an eyeballed 1/16" is enough room to play with, but not too much to be wasteful or sloppy. Sticking with my walnut theme I ran off several strips and began to measure and attach them with a little glue and some brass plated brads.
Driving brads into these little strips without splitting them needs pre-drilling, but with a fine drill bit. this one is metric and measures 1.1 mm. Chucking a finer drill into a hand drill or even a cordless can be interesting depending on how good or worn the chuck is, and drilling with something this fine without snapping the bit is also a balancing act.
My not-so-secret weapon is a pin drill. I found this very nice one on eBay a long while back that works on an Archimedean Screw. There's a little grip near the back that rotates the drill as you push it down, but slides freely back up the shaft to reset the action. HERE'S A LINK to a cell phone video I shot of it in use on this project.
It's a luxury but a really nice problem solver to have one of these.
I didn't shoot for a miter joint or anything fancy where the strips meet. a butt joint but I dressed up the corner with chisel to a shallow 45* after everything was attached.
This work is pretty fast and self explanatory from there. Measure, cut, drill, tack and glue, repeat. I will say I purposely used hide glue incase I every want to take or change these out I can soak the strip in a little denatured alcohol and pry them up without damaging the shelf floor.
Next was creating a space to hold and protect my chisel roll, but that will wait until the next post.
Ratione et Passionis
Oldwolf


Comments
Post a Comment