
Assembly and the Lid
If you have been following along with this build then awesome, thank you. If you have missed out or are coming in on the tail end of things here you can catch up with the rest of the build by clicking on the link HERE.
I started this day by doing the main assembly for the chest,I started by installing the side pieces first. because of the tongue and groove joint of the front panel into the legs, this was forced to be a butt joint. It would be reinforced by a 3 pairs of 3/8" pins but I still made some changes to the original design, The article on medieval chests that I took a lot of instruction from suggested the grain of the side panels should run horizontal, matching the front panel, but as I thought about that and this butt joint I also started to think about wood movement over time and how if I were to run the side panels with the same grain orientation as the legs I wouldn't have any movement issues fighting each other or the joint. (If you haven't, you can check out that article from greydragon.org HERE)
I added some glue to the sides and the legs and positioned the panel. I held pressure with an F Clamp while I predrilled and placed four 6 penny finishing nails, near the top and bottom in the front and back. I gave all these nails a slight angle to add mechanical strength and I countersunk them all below the surface with a nail set. Using these nails gave me the chance to continue working with the piece clamp free while the glue set up.
 I took no pictures and have spent no time on the panel for the bottom, There is nothing special about it to warrant that. It's made of a single width of board that was flattened, smoothed, and cut to fit inside the opening. As it was placed it was also nailed with four 6d finishing nails in pre-drilled holes and countersunk with a nail set.
Glue was used along the matching grain to the front and back panels, not along the cross grain to the sides.
All the nail holes were later filled with homemade wood putty mixing glue and sawdust from the oak.
 With the sides and bottom secured I drilled some 25/64" holes into the wood, just a step bigger than the 3/8" dowels I made the day before. I drilled the holes to a 2" depth as the prepared dowels were 2 1/2"
 A little wood glue in the holes, a careful selection of the best dowels for the front, second best for the sides, and following up with acceptable dowels for the back. Then comes the driving of the pins into the wood. I try to orient the grain of the pins to follow the grain of the wood they're driving through, I think this is important for aesthetics and keeping a consistency in the flow of the grain. Occasionally the pin will twist of its own account in the driving but I don't waste time fighting with it to reorient it. It's a picky thing to start with. I drive the pins home by sound, use your ears and listen to the tone of the pin and wood when you drive it, there is a definite change in pitch when you've bottomed out and should stop pounding.
 Occasionally the pin will pressurize the glue ahead of it in the hole and drive it through the grain of the wood on the side of the panel, I go ahead and clean this up with a moist rag like the rest of my squeeze out, but I make a mark with a pencil to make sure to pay a little more attention to it when I'm final sanding a piece, just to make sure I remove enough to not interfere with any finishing products.
With all the pins set on one side I wipe up as much of the squeeze out as possible and cut the pins flush with a flexible flush trimming hand saw. Then I repeat the process on the sides in and the back. Over all on the front and back there are three pins from each side going through into the bottom panel and two into the side panels. From each side there are an additional two pins going through into the bottom panel.
 I set the workpiece aside and then devoted my attention to flattening and smoothing the boards I joined for the lid. The grain was a little wild and my metal jack planes were having issues so I switched to my wooden body jacks and they took off like wildfire. I like to have options like that, it's amazing how often if I'm stymied with one thing how just changing which tool I'm working with will make a difference.
With the panel set and smoothed I turned the body of the chest back over on top of it and lined it up with the back edge and scribed a line around it to set the orientation of the lid. Through all my measurements and work I felt I had the chest square, heck my trisquare confirmed it, but wood is a tricky bastard that way sometimes and I've had it fool me before. I never take that "square" for granted anymore. The slight variations will destroy you over time. If it looks right then it is right and so I measure my lids for my chest using the chest itself and skipping the tape measure all together. Since I've started to do that, my error rate has dropped to zero. That's a good thing.
After I had the outside edges of the chest scribed down I took a dividers and set it to 5/8" wide and scribed a second outter line that would give space for the lip around the chest.
 A little rip saw work, using the workbench and an overhand grip on the saw took the panel to depth. Because of the thin amount of waste on the width cuts I did those with the band saw. Once the cuts were made the saw marks were smooth planed away.
 Using the piece I cut off I cut a strip for the lip as 5/8" square. This was done on the table saw. Some glue was laid down and clamps were applied.
 The side lip was made from 5/8" square pieces cross cut so they would show end grain like the lid. The width of the board was only about 4" so I cut several pieces, squared them up on the shooting board, and lined them up end to end.
 While the glue dried on the lid's lip I took some time to measure and cut notches for the hinges. Here I finally made my first real mistake. Not thinking or paying attention I scribed the lines to be notched on the front panel of the chest, for those playing at home, hinges attach on the back panel. . . Oops, I didn't catch it until after I had scored the lines with a chisel and notched the first for a "first class" saw cut. I'm not sure how I caught it then, but I'm glad I did before the notches had gone any further. I'm not sure how I would have fixed that and made it look decent. As it stands I left the lines and the notch alone deciding that anything I would try to do to disguise them would make them stand out even more. Sometimes the enemy of good is better.
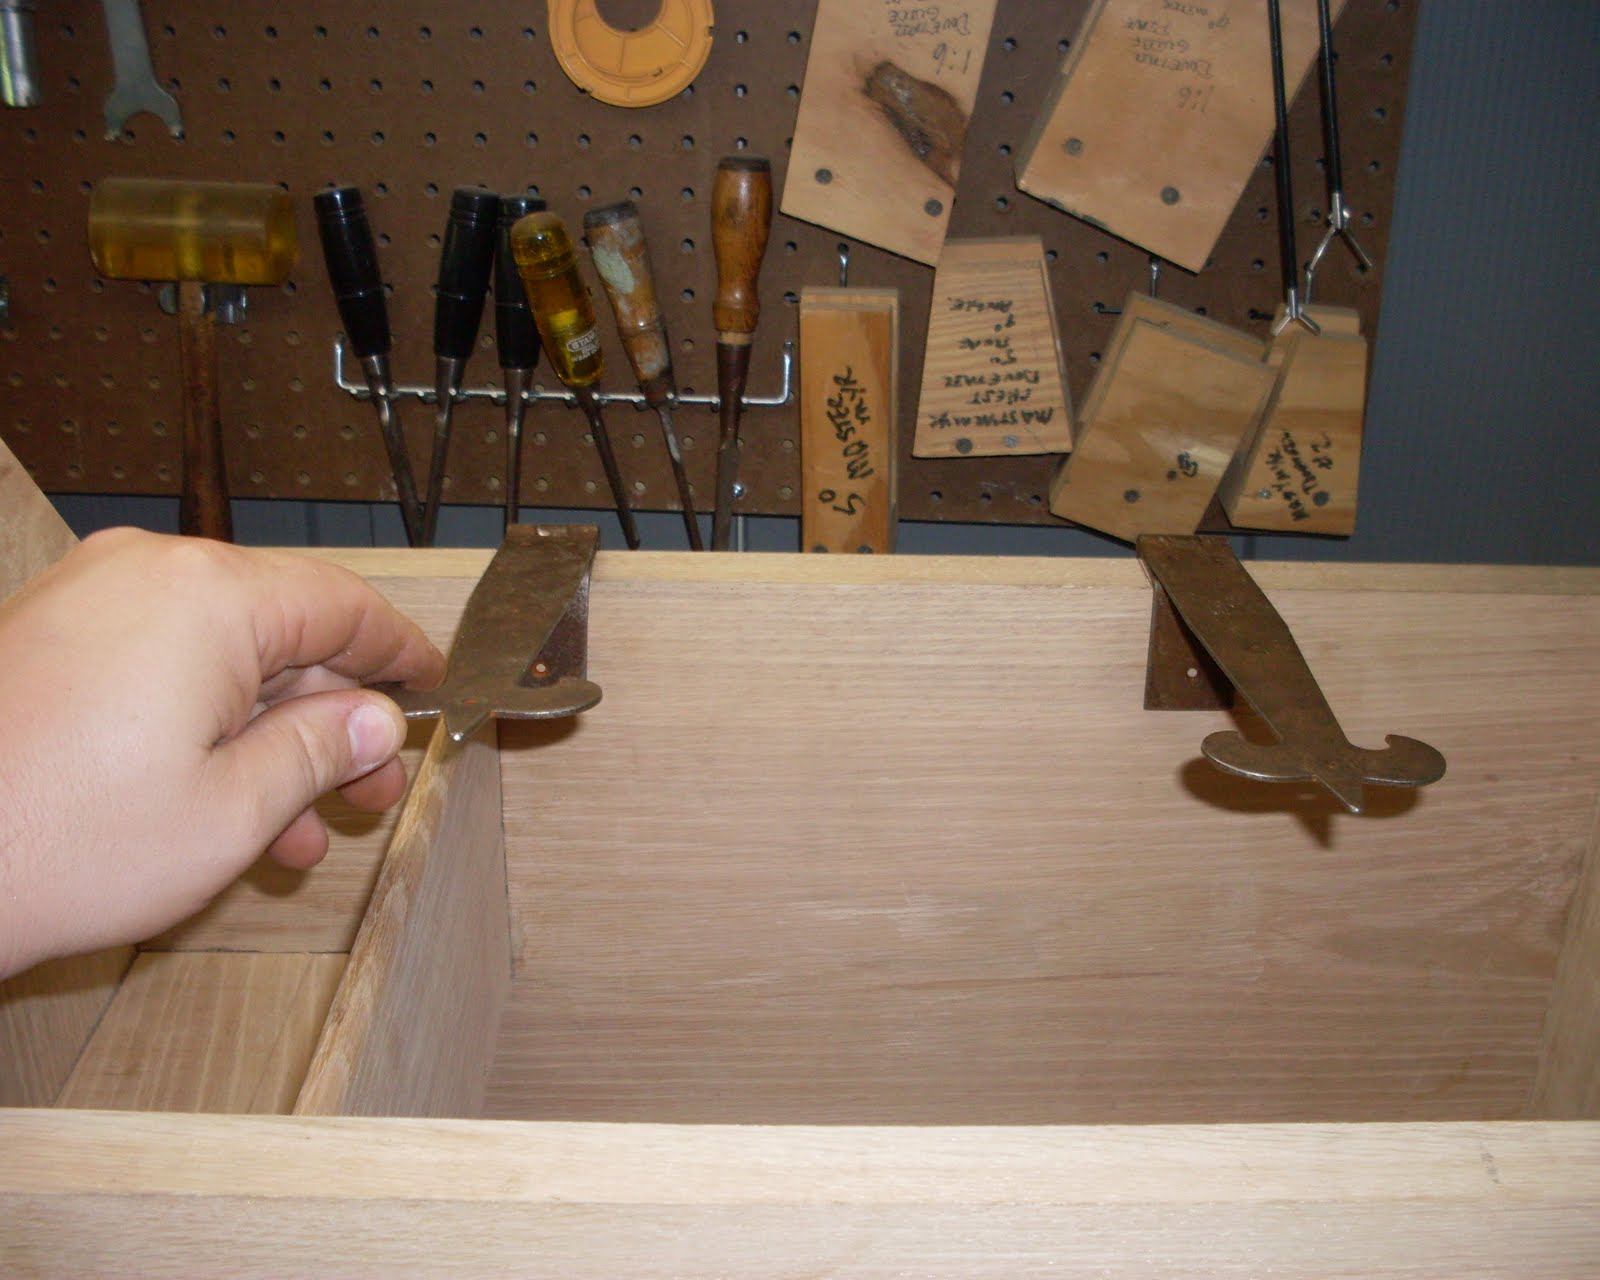
This pic is actually of me lining up the hinges on the front panel after I had bent the hinges to what I needed. I have to say I really am a big fan of these strap hinges from Lee Valley, I think they look awesome in these applications.
 As the lid dried I used a belt sander to clean up the edges (I didn't want to plane into any reversing grain at this point) and I generally cleaned up the lip and made it look presentable. As I went getting hinges lined up on the lid I noticed that my inset bottom panel had left a few small gaps between it and the front, back and side panels. No problems structurally but looks wise it left an unfinished taste to the bottom of the inside.
I ripped off a couple small strips on the table saw, 3/8" by 5'8" and I used a small finger plane and spokeshave to chamfer an angle on them. I mitered the corners and fit them into the bottom. I used some CA glue to secure them in place. I have to admit I am pretty new to the CA glue concept in woodworking, I've used super glue for lots of other things, but for this application it was perfect. An impossible place to fit a clamp and super difficult to drive a brad. Those things only end in tears and swearing (I've been there) that CA glue almost made it too easy.

 I decided to leave things to dry there overnight, I would come back the next day to do the final sanding and apply the finish.
Cheers
Oldwolf
I started this day by doing the main assembly for the chest,I started by installing the side pieces first. because of the tongue and groove joint of the front panel into the legs, this was forced to be a butt joint. It would be reinforced by a 3 pairs of 3/8" pins but I still made some changes to the original design, The article on medieval chests that I took a lot of instruction from suggested the grain of the side panels should run horizontal, matching the front panel, but as I thought about that and this butt joint I also started to think about wood movement over time and how if I were to run the side panels with the same grain orientation as the legs I wouldn't have any movement issues fighting each other or the joint. (If you haven't, you can check out that article from greydragon.org HERE)
I added some glue to the sides and the legs and positioned the panel. I held pressure with an F Clamp while I predrilled and placed four 6 penny finishing nails, near the top and bottom in the front and back. I gave all these nails a slight angle to add mechanical strength and I countersunk them all below the surface with a nail set. Using these nails gave me the chance to continue working with the piece clamp free while the glue set up.

Glue was used along the matching grain to the front and back panels, not along the cross grain to the sides.
All the nail holes were later filled with homemade wood putty mixing glue and sawdust from the oak.


With all the pins set on one side I wipe up as much of the squeeze out as possible and cut the pins flush with a flexible flush trimming hand saw. Then I repeat the process on the sides in and the back. Over all on the front and back there are three pins from each side going through into the bottom panel and two into the side panels. From each side there are an additional two pins going through into the bottom panel.

With the panel set and smoothed I turned the body of the chest back over on top of it and lined it up with the back edge and scribed a line around it to set the orientation of the lid. Through all my measurements and work I felt I had the chest square, heck my trisquare confirmed it, but wood is a tricky bastard that way sometimes and I've had it fool me before. I never take that "square" for granted anymore. The slight variations will destroy you over time. If it looks right then it is right and so I measure my lids for my chest using the chest itself and skipping the tape measure all together. Since I've started to do that, my error rate has dropped to zero. That's a good thing.
After I had the outside edges of the chest scribed down I took a dividers and set it to 5/8" wide and scribed a second outter line that would give space for the lip around the chest.


This pic is actually of me lining up the hinges on the front panel after I had bent the hinges to what I needed. I have to say I really am a big fan of these strap hinges from Lee Valley, I think they look awesome in these applications.
I ripped off a couple small strips on the table saw, 3/8" by 5'8" and I used a small finger plane and spokeshave to chamfer an angle on them. I mitered the corners and fit them into the bottom. I used some CA glue to secure them in place. I have to admit I am pretty new to the CA glue concept in woodworking, I've used super glue for lots of other things, but for this application it was perfect. An impossible place to fit a clamp and super difficult to drive a brad. Those things only end in tears and swearing (I've been there) that CA glue almost made it too easy.


Cheers
Oldwolf


Comments
Post a Comment