
Rematch In Walnut
A few months ago, as winter gripped Wisconsin in it's sharp black talons, I attempted my own version of Chuck Bender's William and Mary Bookstand. The one he built for the November 2010 issue of Popular Woodworking Magazine. I'm not going to rehash my issues except to say that I failed to do a good job of choosing my stock.
As I banished the white oak catastrophe into the dark, cobwebbed corners, I vowed to return for a rematch, and this time I would win. While I could have just burned it or scrapped it, I left it sit, so it could stare at me in judgement, day in and day out. There was something about the piece that spoke to me the minute I saw pictured of it, whether it's the proportions or the novelty of the work. I just really dig it, and woodworking skill wise there is a lot going on here that isn't obvious at a first glance. It has dovetailing, mortise and tenons, turned feet, proportioned decorative cut outs, and moving parts. There's a lot going on in this little guy that's going to take up a square foot of room on a table or desk someday.
Last autumn, friends gave me some black walnut culls off of their land. I split them with mallets, wedges, axes, and mauls into a whole bunch of very rough stock. It had been weathering in the woods for more than a year before I brought it home. After waiting the last several months I had the feeling that it was ready to be worked. I don't own a moisture gauge to tell me anything, I went a little older school and put a jack plane to a smaller piece and when I arrived at a reasonably level grade, I used an old fashioned moisture meter, my hands. This stuff wasn't green anymore, and by the quality of the shavings I was getting, crisp and clean edges, no dragging or feathering. I decided it was ready enough.
I didn't know how much I was going to get from each split, I had never worked wood this rough before, so I pulled four candidates from the pile and lined them up against the bench.
 Then I sat down and stared at them for the longest while. Half intimidated, half excited, but all over, unsure where to start the process. I weighed my options and decided the best way to start was with the outer frame. There was four pieces of stock to the frame each approximately 12" long by 3/4" thick by 1 3/4" wide. If I started by sawing up one board into four 14" sections, I should be able to at least mill one stock board from each section.
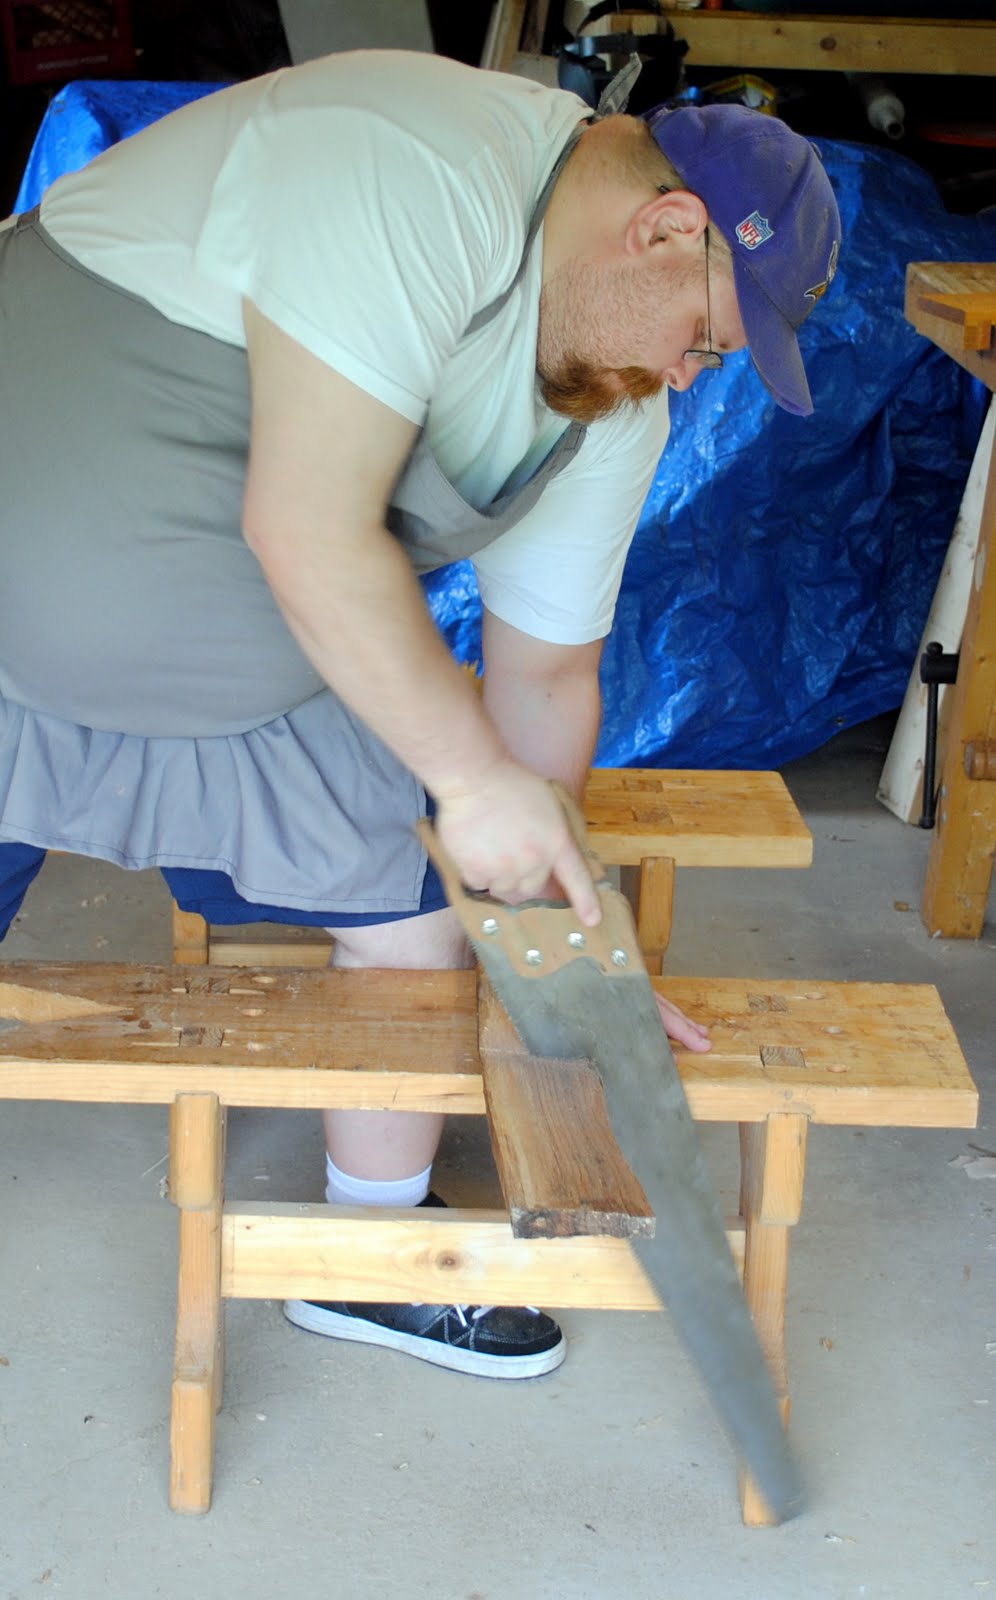
 The piece I selected had been somewhat flattened back in the fall just after it was riven apart. (Sometimes I have the patience of a toddler with ADD, I just had to plane at least one board that day, just to see) I marked some rough lines in pencil and just went to work with my course crosscut saw.
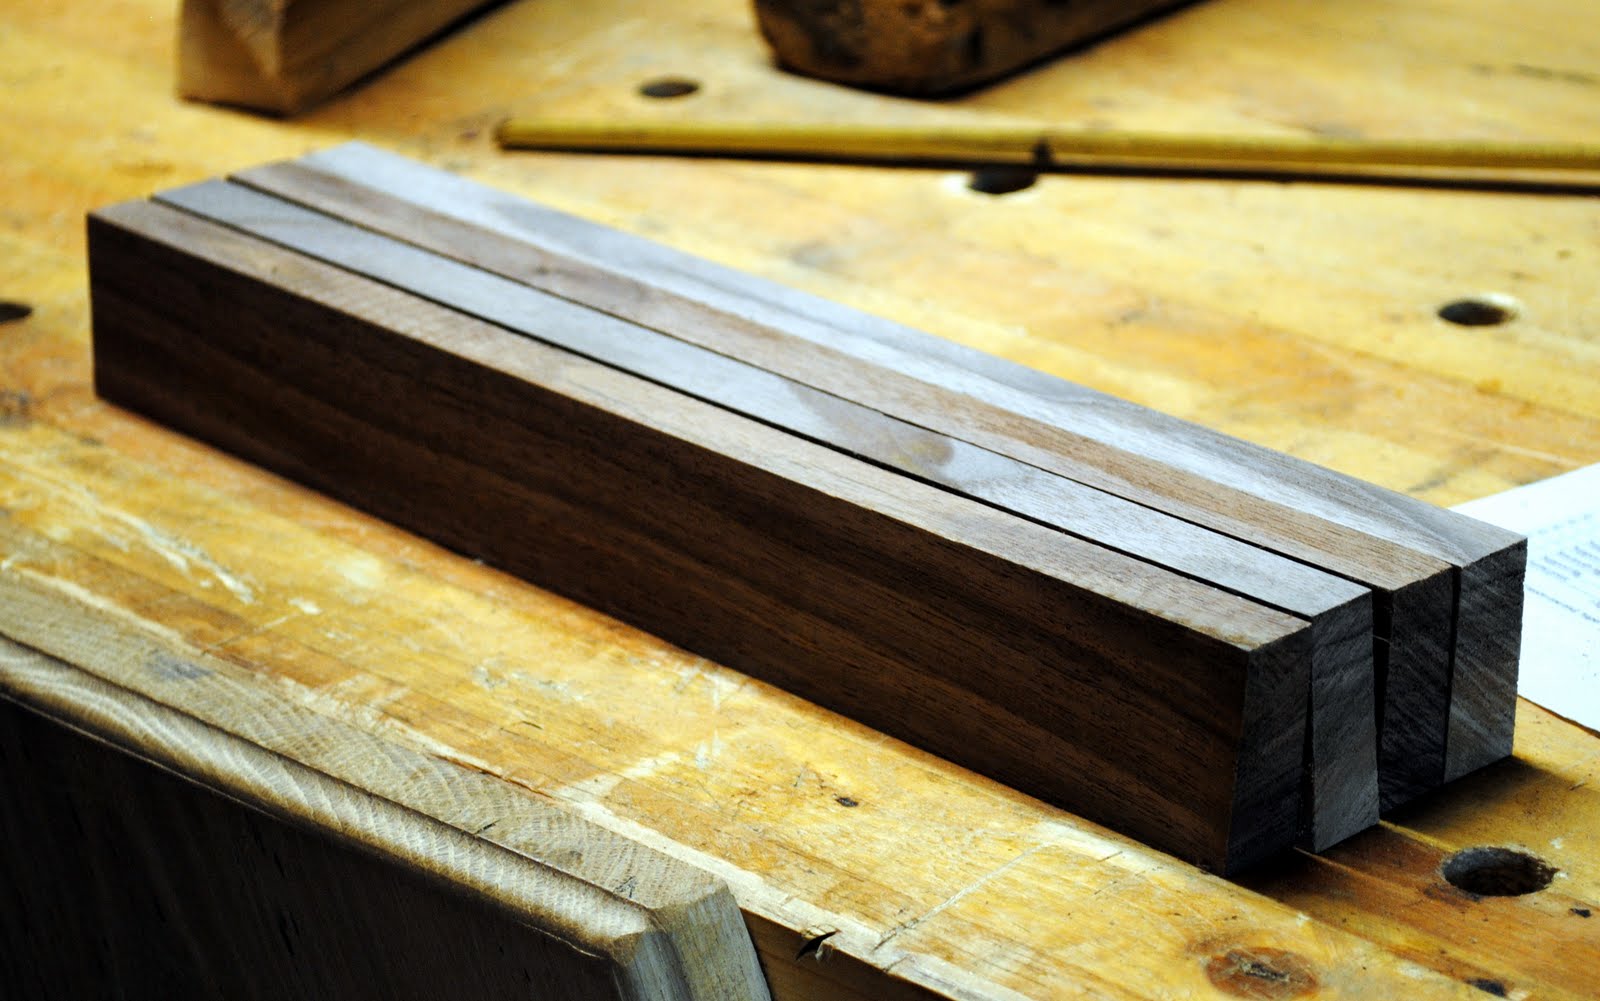
 Once I had the pieces sawn I could see the benefit of riving the lumber. Just look at the growth rings and how they run vertical and all line up. As good as or better than quarter sawn. I had chosen my stock very well for this go around.
 I then took one board over to the power joiner and flattened one face.
 I then used that flattened face as a reference to joint one edge square to that face. I then used the table saw to cut the other edge parallel to the first face.
 Now I had stock that was square on three sides. I do not own a thickness planer so I took the resaw route.
 On the bandsaw I cut the stock down to just a little over 3/4" thick, leaving enough to hand plane the board smooth and keep the thickness I wanted. When I was done with the first experiment I realized that I had enough stock in one of these pieces to get two sections of the frame. I ran another section of stock through the same process and ripped them to width.
 Man the color in this walnut is incredible. It feels good to be back at this project and feeling like I can finish it off this time.
 Ratione et Passionis
Oldwolf
Want to see the process of splitting the Black Walnut culls click HERE.
Want to get a look at Chuck Bender's notes on his blog Parings Click HERE
If you want to read about that failure you can catch the misery by clicking on the link HERE. (This post will be collected there as well, you'll just have to scroll past it)
As I banished the white oak catastrophe into the dark, cobwebbed corners, I vowed to return for a rematch, and this time I would win. While I could have just burned it or scrapped it, I left it sit, so it could stare at me in judgement, day in and day out. There was something about the piece that spoke to me the minute I saw pictured of it, whether it's the proportions or the novelty of the work. I just really dig it, and woodworking skill wise there is a lot going on here that isn't obvious at a first glance. It has dovetailing, mortise and tenons, turned feet, proportioned decorative cut outs, and moving parts. There's a lot going on in this little guy that's going to take up a square foot of room on a table or desk someday.
 |
| This picture was shamelessly borrowed from Chuck Bender's Blog "Parings" But it's difficult to talk about the piece without having a finished picture here to help you visualize it. |
I didn't know how much I was going to get from each split, I had never worked wood this rough before, so I pulled four candidates from the pile and lined them up against the bench.


Oldwolf
Want to see the process of splitting the Black Walnut culls click HERE.
Want to get a look at Chuck Bender's notes on his blog Parings Click HERE
If you want to read about that failure you can catch the misery by clicking on the link HERE. (This post will be collected there as well, you'll just have to scroll past it)


Walnut, air dried only, is one of my all time favorite woods. The beautiful contrast between the sap and heart wood is sometimes breathtaking. I'm looking forward to your approach on this build.
ReplyDeleteBeautiful Walnut. Can't wait to see how it turns out.
ReplyDeleteVery nice work... and what a satisfying pleasure to take a project from tree to (knock on wood hahah) completion!
ReplyDeleteBeautiful Walnut!!
ReplyDeleteI need to do something similar with a mahogany tree felled a year ago after an hurricane. But I'm thinking on a chainsaw instead an axe.
superhero77.blogspot.com